


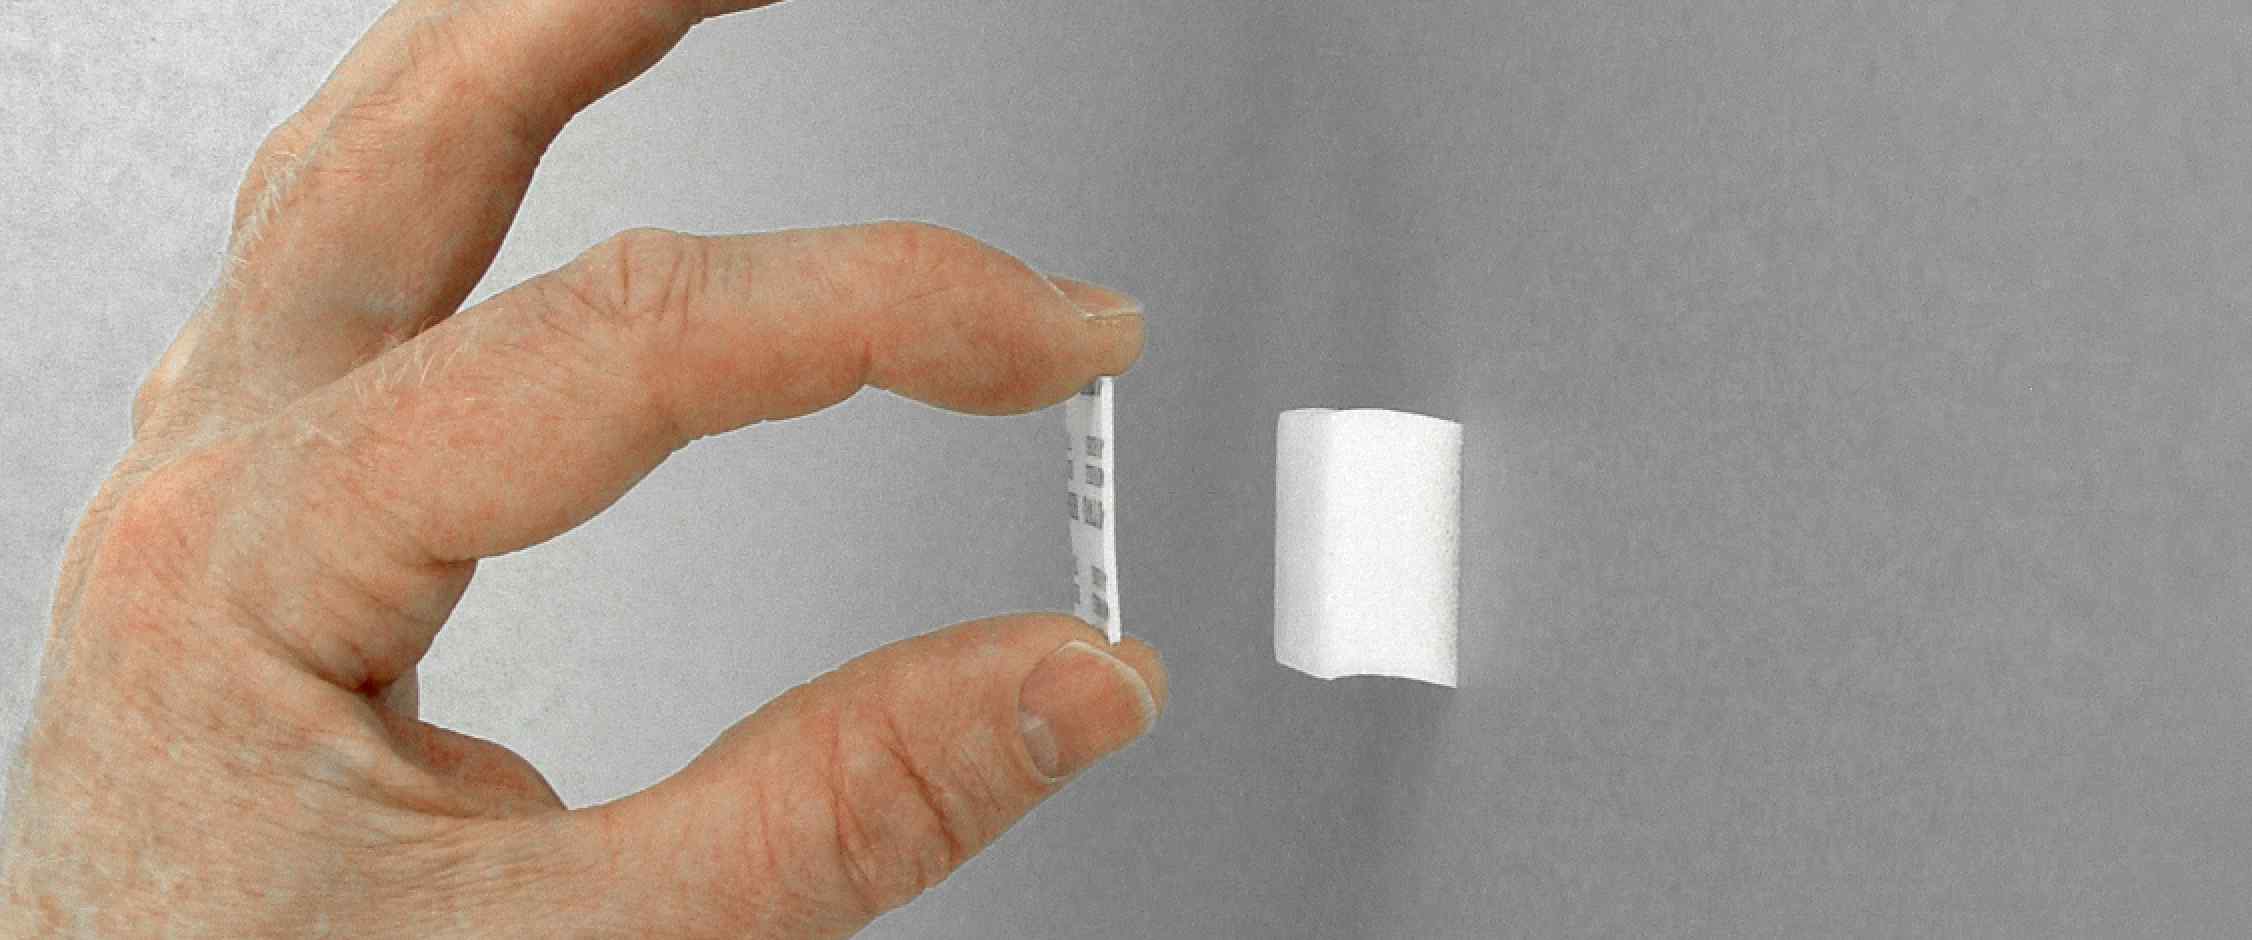
Panel Poster extensions are used to increase the adhesive foam block height by 1/32" (0.79 mm) to reduce the curvature of a panel surface.

Be aware that safety is your responsibility.
Introduction
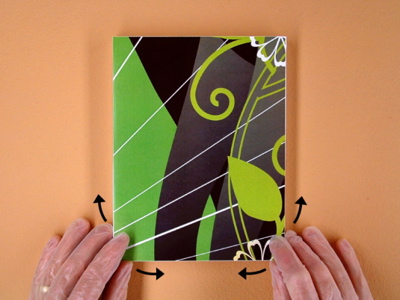
Each panel is intentionally designed to be slightly taller than the adhesive foam block. (PIC 1-1) This allows you to position the panel on the wall before the final bond, make minor alignment adjustments after installing, and produce a snug fit between the panel and wall. (PIC 1-2, PIC 1-3)
Since the panel is taller than the foam block, the face is slightly curved inward on an installed panel. The benefit to the curve is a fast and trouble-free installation. However, the curved surface may be noticeable in some lighting conditions. This usually appears in solid, colored panels printed with a glossy finish. If this is a problem, you can use extensions to minimize the curve on the face.
Using extensions makes the installation more difficult and is recommended for experienced installers. This guide assumes you are experienced with panel poster installations and will only cover how to modify the panel poster install to accommodate the extensions.

(PIC 1-1)

(PIC 1-2)
(PIC 1-3)
Extending an Existing Poster
It is easier to add extensions to a poster that is installed. The blocks are already in position, and you can use the installed panels to help align the extended panels as you go.
1. Extend top row
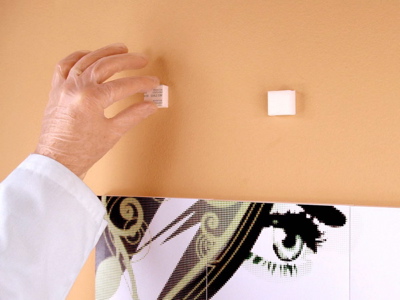
Carefully remove the first row from the poster leaving the adhesive blocks on the wall. (PIC 2-1) Remove an extension from the sheet and place it on the first block. (PIC 2-2) It doesn't have to be perfect, just close. Apply firm pressure while rocking your finger back and forth to set the adhesive. (PIC 2-3) Add extensions to the rest of the top row.
2. Reinstall first row
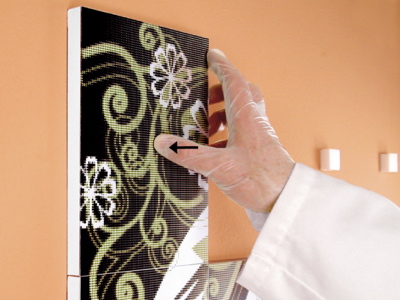
Peel away the protective cover on the first extension and reinstall the upper left panel from the poster. The extended block may stick to the panel before you have position. If this is the case you will need to rest the bottom edge on the wall and rotate the top edge into place. (PIC 2-4) Make sure it is aligned with the left edge and snug against the panel below it. (PIC 2-5). Add extensions and reinstall the rest of the panels in the first row. Make sure each panel is snug with the left and bottom panels. (PIC 2-6, PIC 2-7)
3. Repeat for the rest
Carefully remove the rest of the panels leaving the adhesive blocks on the wall. (PIC 2-8) Add extensions to the blocks, and reinstall the rest of the panels. Make sure each panel is snug with the adjacent panels. (PIC 2-9)

(PIC 2-1)
(PIC 2-2)

(PIC 2-3)

(PIC 2-4)
(PIC 2-5)

(PIC 2-6)

(PIC 2-7)

(PIC 2-8)

(PIC 2-9)


