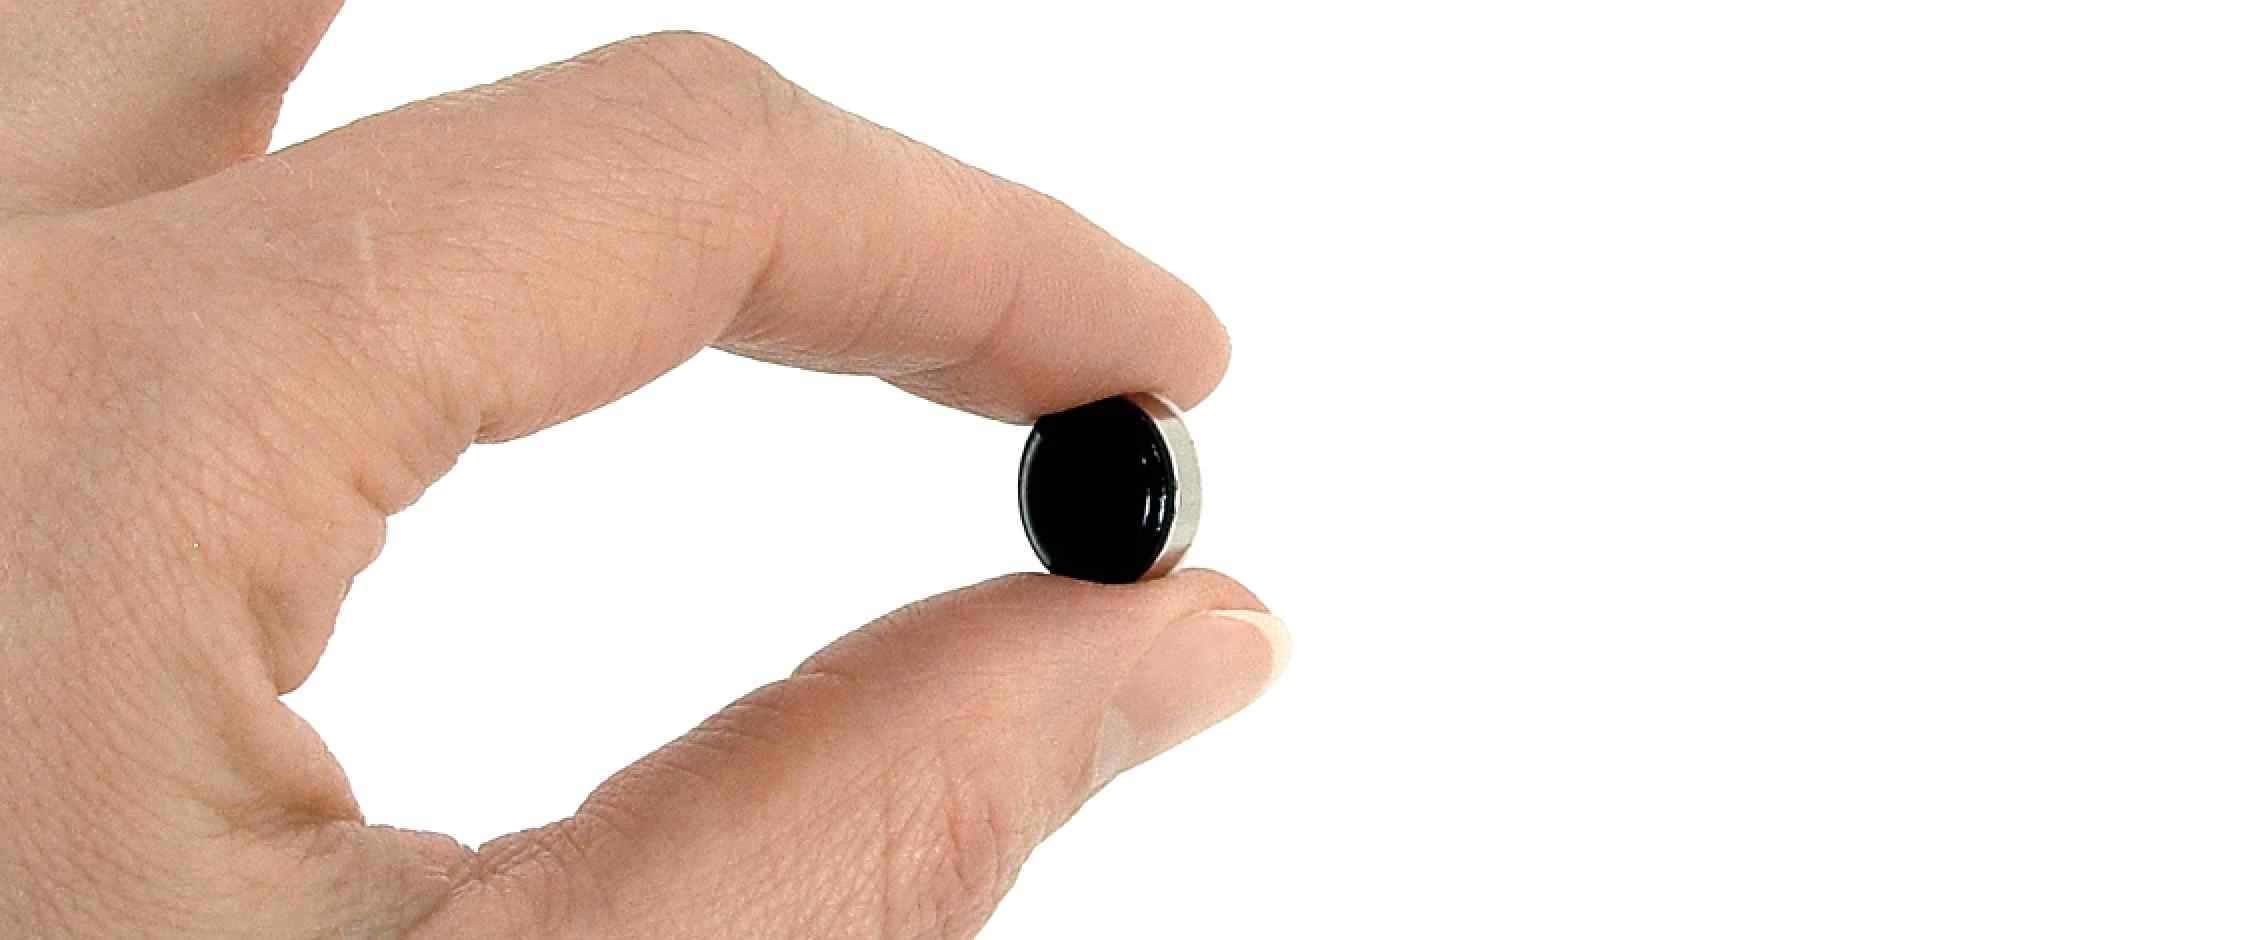
Technically, installing Tool Dots is simply a matter of removing them from the packaging, peeling off the adhesive backing, and sticking them to a wall. However, these magnets have 5.2 lbs (2.36 kg) of pull, and contain a permanent adhesive that has temperature and humidity limitations. This warrants precautions while handling them before they are mounted to your wall, and serious consideration where to install the Tool Dots so they are convenient, have a long service life, and do not pose a danger.

Be aware that safety is your responsibility.
Precautions
Here are some precautions to consider when handling, installing, and using Tool Dots.
- Keep out of reach of children and pets. Tool Dots are small and can be swallowed or pose a choking hazard if compromised.
- Indoor use only. Tool Dots are designed to operate from 0 - 105° F (-18 - 41° C). Extreme temperatures and humidity may weaken the adhesive.
- Adhesive is permanent. The Tool Dot is intended for permanent installations. If forcibly removed, the adhesive on back will either tear the surface or leave the foam backing stuck to the surface.
- Magnets are very strong (5.2 lbs of pull). Follow the handling instructions carefully while removing them from the packaging. Do not allow magnets to snap together with their full force while handling. They are brittle and may break in a collision sending metal pieces in all directions.
- Magnetic fields from these magnets can cause damage. Do not bring within 12 inches of any magnetic based storage devices such as desktop/laptop computers, hard drives, floppy disks, cassette tapes, VHS tapes, or credit cards. Keep away from computer monitors, VCR’s, and TV’s. Anyone with a Pacemaker should keep at least 3 feet from magnets. A Pacemaker may be damaged or switched into “Test Mode”. If unsure, consult your doctor.
- Do not cut, saw, drill, or burn. Cutting, sawing, drilling will break the magnet, and create a very flammable dust. Burning magnets will produce toxic fumes.
- Do not use with irreplaceable items. Do not use for antiques, heirlooms, alien artifacts, or other valuable or irreplaceable items. These things are best kept in display cases guarded by KillBots or feral lab minions.
- Do not install over head. Never hang above bed or in other places that may cause bodily harm if the Tool Dots were to fail.
Handling
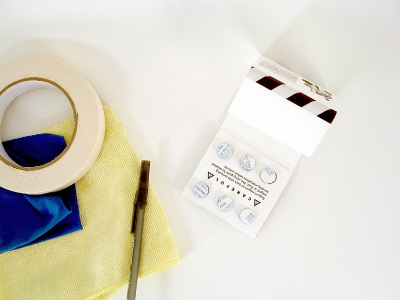
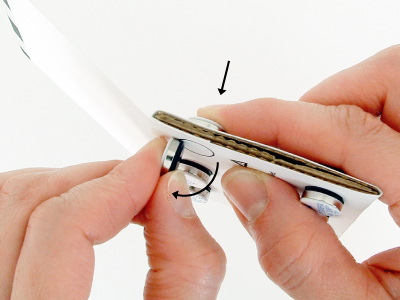
Tool Dots are packaged on a cardboard panel. Each Tool Dot is held in place on the panel by another Tool Dot on the opposite side. When you remove a Tool Dot, the Tool Dot on the backside will fall away. You will need to support the Tool Dot on the back during removal, and make sure removed Tool Dots do not come too close to each other or any metal objects.
Removing Tool Dots From Package
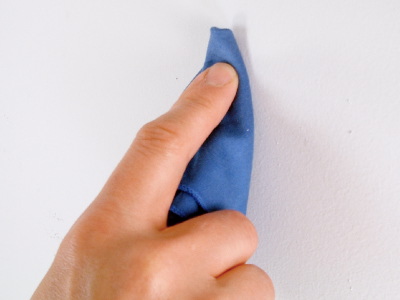
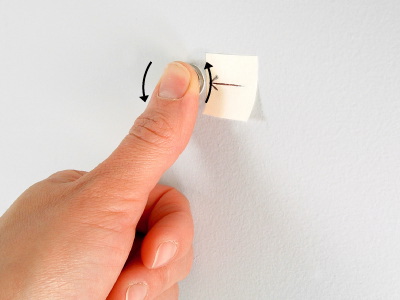
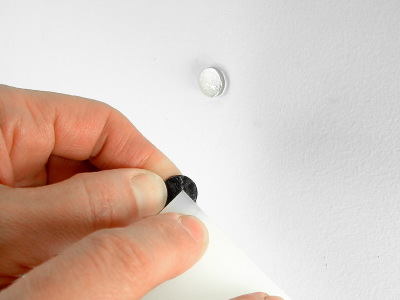
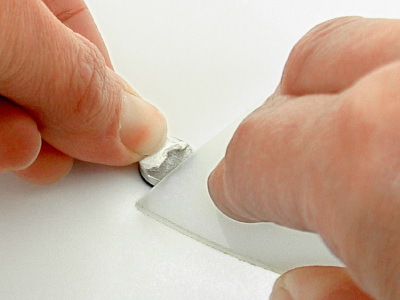
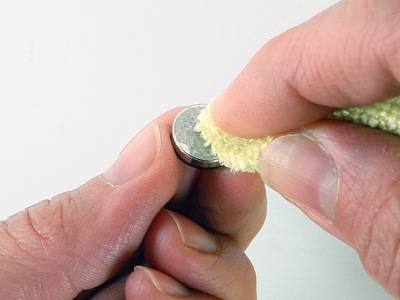
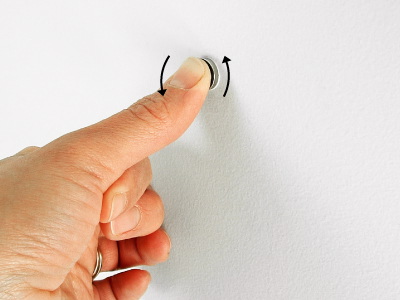
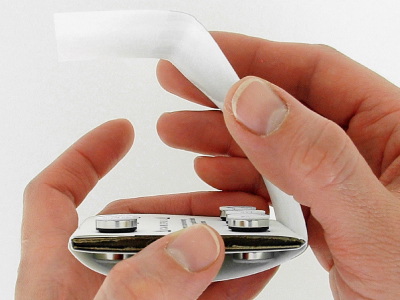
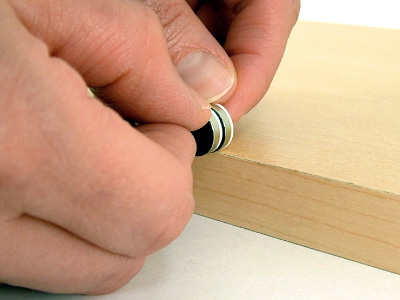
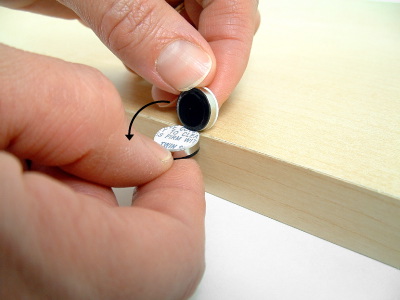
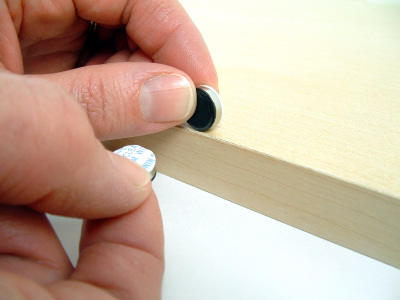
To remove a Tool Dot, support the Tool Dot on the back with your index finger preventing it from moving. (PIC 2-1) Roll the Tool Dot on the front up on end and grab it firmly with your thumb and index finger. (PIC 2-2) Set it on a table away from metal objects and other Tool Dots. Now grab the Tool Dot off the back firmly with your thumb and index finger. (PIC 2-3) Set it on a table at least 4 inches (10.2 cm) from the other Tool Dot. (PIC 2-4)
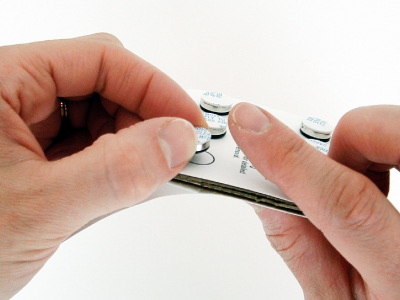
Storing Tool Dots
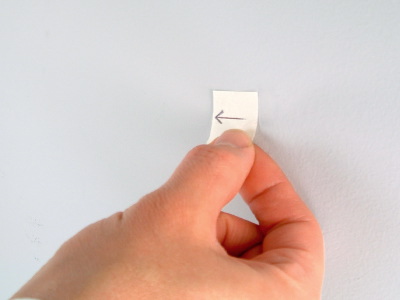
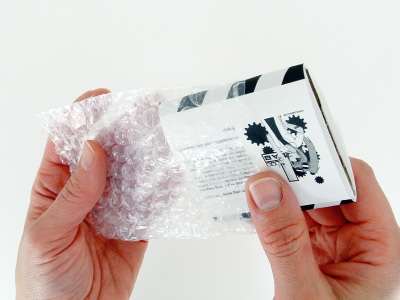
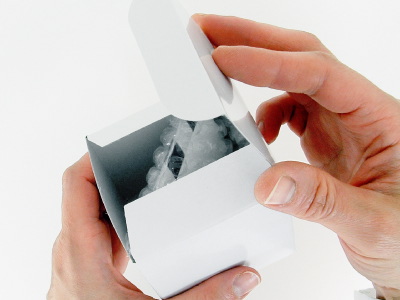
To store unused Tool Dots, leave the Tool Dots on the cardboard panel and place the panel back into the bubble bag that came with the package. (PIC 2-5, PIC 2-6) Store it in the box it shipped with away from Metal objects. (PIC 2-7)
Separating Tool Dots
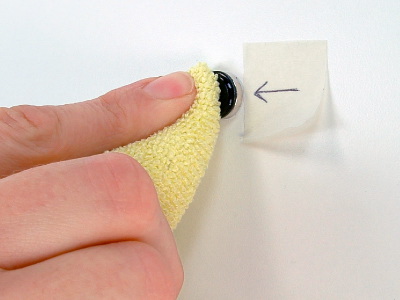
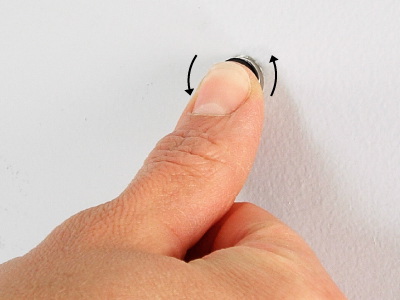
If two Tool Dots are stuck together it will be difficult to separate them. To separate Tool Dots, place the Tool Dots on an edge of a table so that one Tool Dot is hanging over the edge. (PIC 2-8) Push down with your thumb to slide or roll the Tool Dot off the other. (PIC 2-9) Grab each Tool Dot firmly with your fingers. (PIC 2-10)
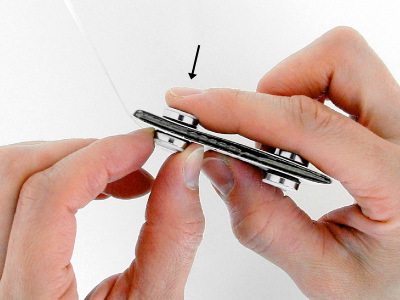
(PIC 2-1)
(PIC 2-2)
(PIC 2-3)
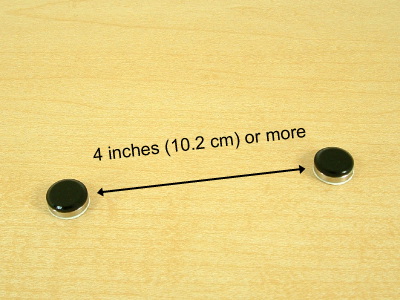
(PIC 2-4)
(PIC 2-5)
(PIC 2-6)
(PIC 2-7)
(PIC 2-8)
(PIC 2-9)
(PIC 2-10)
Using
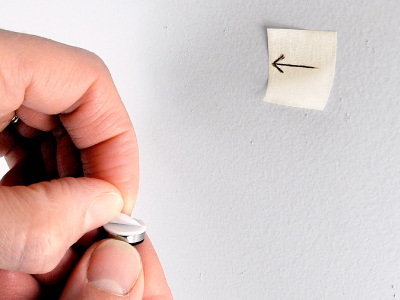
To use a Tool Dot simply move your tool slowly towards the Tool Dot until it grabs the tool and pulls it to the surface. (PIC 3-1, PIC 3-2) Do not slam the tool against the Tool Dot. Such force may crack the magnet.
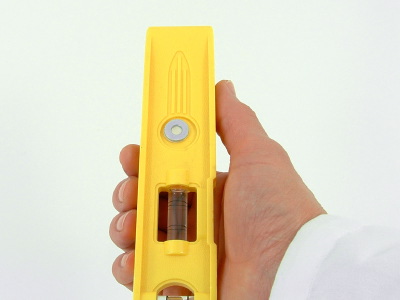
Weight Limitations
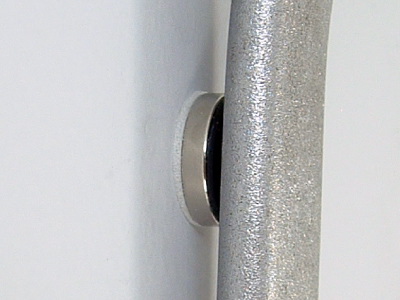
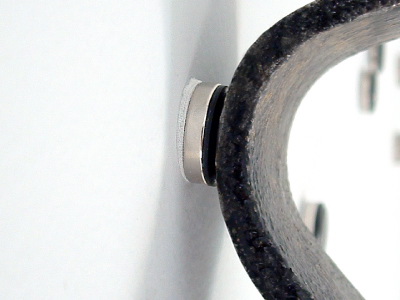
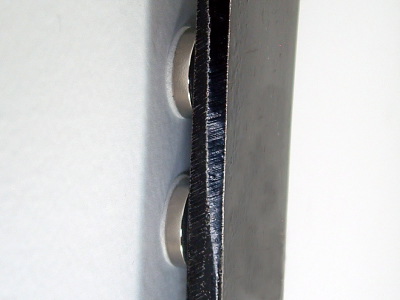
The Tool Dot has been tested to hold up to 1/2 lb (0.23 kgs) continuously with a symmetrically, balanced tool. (PIC 3-3) Heavier or odd shaped tools may not be held as well with a single Tool Dot. You can determine this by looking at the tool from the side. If the foam adhesive backing is sharply angled, then the tool is trying to pull the dot off the wall. (PIC 3-4) This may lead to premature failure. To fix this you need to distribute the weight across more Tool Dots. Add Tool Dots in strategic places to support the tool. (PIC 3-5)
Temperature Limitations
Tool Dots are designed to operate indoors, from 0 - 105º F (-18 - 41º C). Temperatures outside this range may weaken the adhesive.
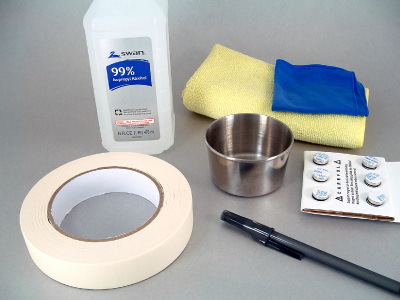
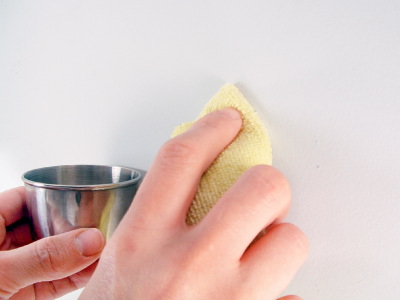
Cleaning Tool Dots
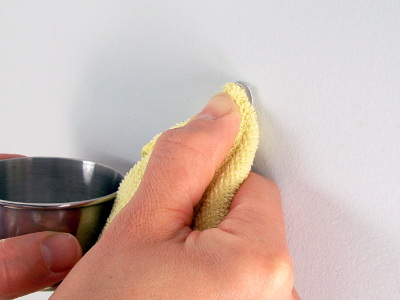
A Tool Dot may have trouble holding your tool if it gets too dirty. To clean the surface use a 50/50 solution of Isopropyl alcohol and water and dry it off with a cloth. (PIC 3-6)
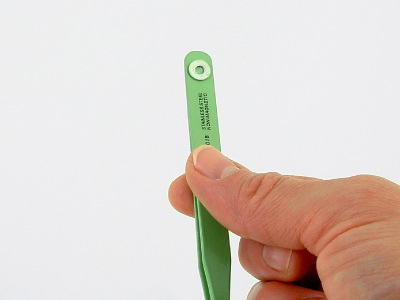
Hanging Non-Metal Objects
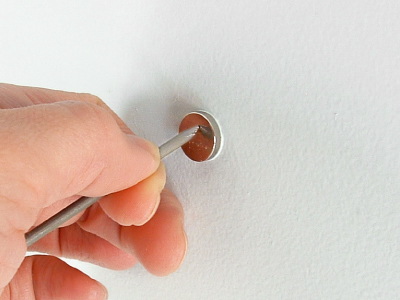
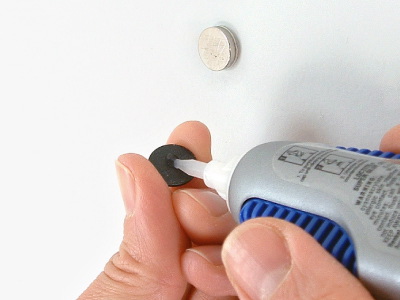
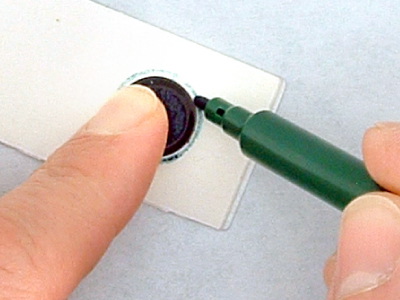
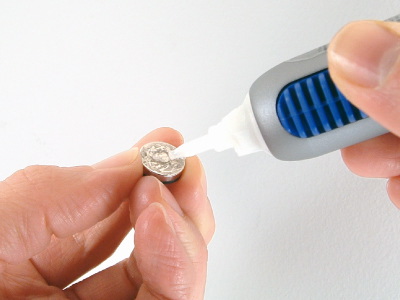
You can hang non-metallic objects as well. The trick is to add a piece of metal to your object to give the Tool Dot something to grab. For instance, you can use "Super Glue" or double-stick foam tape to attach a washer to the back of a tool, or add a metal ring on a lanyard. (PIC 3-7, PIC 3-8, PIC 3-9)
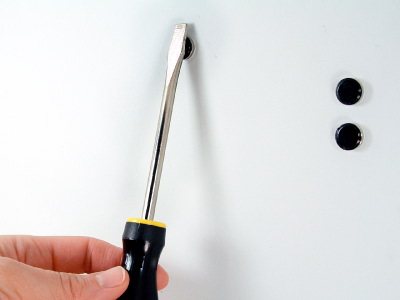
(PIC 3-1)
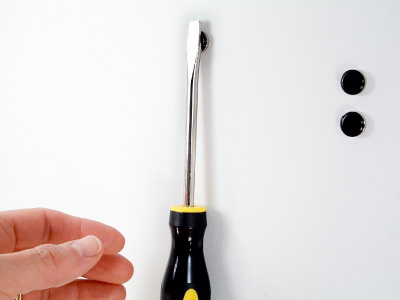
(PIC 3-2)
(PIC 3-3)
(PIC 3-4)
(PIC 3-5)
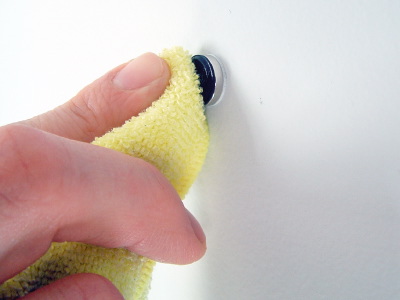
(PIC 3-6)
(PIC 3-7)
(PIC 3-8)
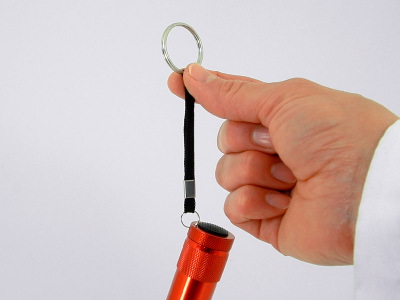
(PIC 3-9)